Getting Started
Getting Started as a JaCaMo Application Developer
This guide walks you through the process of creating a Multi-Agent application using JaCaMo platform.
What You Will Build
You will build a very simple Multi-Agent System composed of two agents that exchange simple messages. These agents are named Bob and Alice. In the application, Alice sends a hello message to Bob, they are situated in the same environment and participate into an organisation.
What You Need
-
Java 21 or newer
-
A shell terminal
-
A text editor (Visual Studio Code, Notepad, …)
Creating an initial application
The following commands will create a new JaCaMo application identified by my1st-app with some initial source code for agents, environment and organization. (The first time you run JaCaMo takes longer since it downloads all dependencies.)
NOTE: You find alternatives to create JaCaMo applications here (using codespace/gitpod/docker/…).
Unix:
wget -q http://jacamo-lang.github.io/jacamo/nps/np1.3.zip
unzip np1.3.zip
./gradlew -Dexec.args="my1st-app --console"
If you do not have wget installed, an alternative is:
curl -LO http://jacamo-lang.github.io/jacamo/nps/np1.3.zip
unzip np1.3.zip
./gradlew -Dexec.args="my1st-app --console"
Windows:
-
Unzip
-
Run
gradlew.bat. When asked to give an identification, you should answermy1st-app.
Example of output:
Creating JaCaMo application my1st-app

You can run your application with:
   cd .../my1st-app
   ./gradlew -q --console=plain
Several files and folders were created, the most relevant are:
├── my1st_app.jcm      // JaCaMo application file
├── build.gradle       // Gradle script to run the application
├── logging.properties // Logging configuration
└── src
    ├── agt            // Code for agents
    │   └── sample_agent.asl
    ├── env            // Code for environment
    │   └── example
    │       └── Counter.java
    ├── org            // Code for organisation
    │   └── org.xml
    └── test           // Code for testing
Execution
The application is ready to be executed with the commands:
cd my1st-app
./gradlew -q --console=plain
producing the following output:
CArtAgO Http Server running on http://127.0.0.1:3273
Jason Http Server running on http://127.0.0.1:3272
[Cartago] Workspace w created.
[Cartago] artifact c1: example.Counter(3) at w created.
[sample_agent] join workspace /main/w: done
[sample_agent] focusing on artifact c1 (at workspace /main/w) using namespace default
[sample_agent] focus on c1: done
[sample_agent] hello world.
As you can see in the last line, an agent named sample_agent has
printed a “Hello World” message. The JaCaMo Application however keeps
running, even without having anything to do. To stop the execution, you
can press <CTRL>-C.
Creating agents alice and bob
So, you will now remove this sample_agent from the application and add
alice and bob.
The file my1st_app.jcm contains the list of initial agents of the MAS.
Edit this file so that is looks as follows:
my1st_app.jcm
mas my1st_app {

    agent alice
    agent bob

}
The source codes of these agents are expected to be in the files
alice.asl and bob.asl placed in the folder src/agt. Using your
preferred editor, create the file src/agt/alice.asl as follows:
alice.asl
!say_hello.   // initial goal

+!say_hello   // plan to achieve goal say_hello
   <- .send(bob,tell,greeting("hello world")).

// some usual includes for JaCaMo projects:
{ include("$jacamo/templates/common-cartago.asl") }
{ include("$jacamo/templates/common-moise.asl") }
{ include("$moise/asl/org-obedient.asl") }
This code states that alice has one goal, created when alice starts running. This goal can be achieved by a plan (3rd and 4th lines) that simply sends a message to another agent named bob telling him greeting("hello world").
Details about the language used to code the agents and the language used for their communication is covered in other documents.
The source code for bob (file src/agt/bob.asl) is:
bob.asl
+greeting(M)[source(A)] <-  // plan to react to new beliefs
    .print("I received ",M," from ",A).

// some usual includes for JaCaMo projects:
{ include("$jacamo/templates/common-cartago.asl") }
{ include("$jacamo/templates/common-moise.asl") }
{ include("$moise/asl/org-obedient.asl") }
This plan states that as soon as bob has a belief that matches greeting(M)[source(A)], it prints out a message. This belief is added in his mind as the consequence of receiving alice’s message.
Execute the application again with the command
./gradlew -q --console=plain and now the output is:
[bob] I received hello world from alice
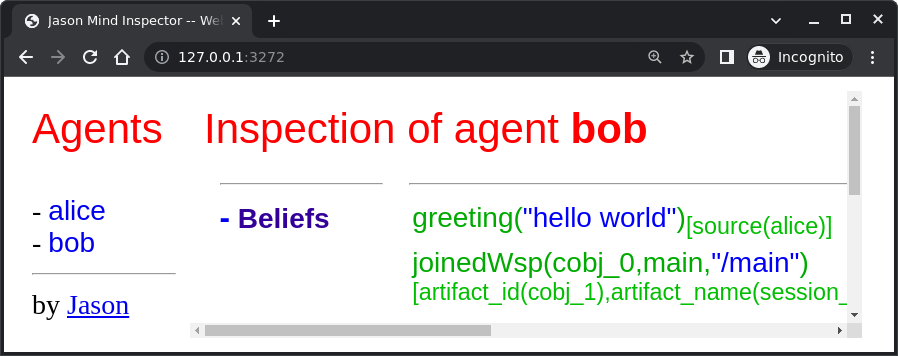
You can now open the Mind Inspector by clicking at
http://127.0.0.1:3272 and select bob in the list of agents. As you
can see, bob’s belief is greeting("hello world")[source(alice)]. When
his plan is executed, variable M is bound to "hello world" and A
to alice.

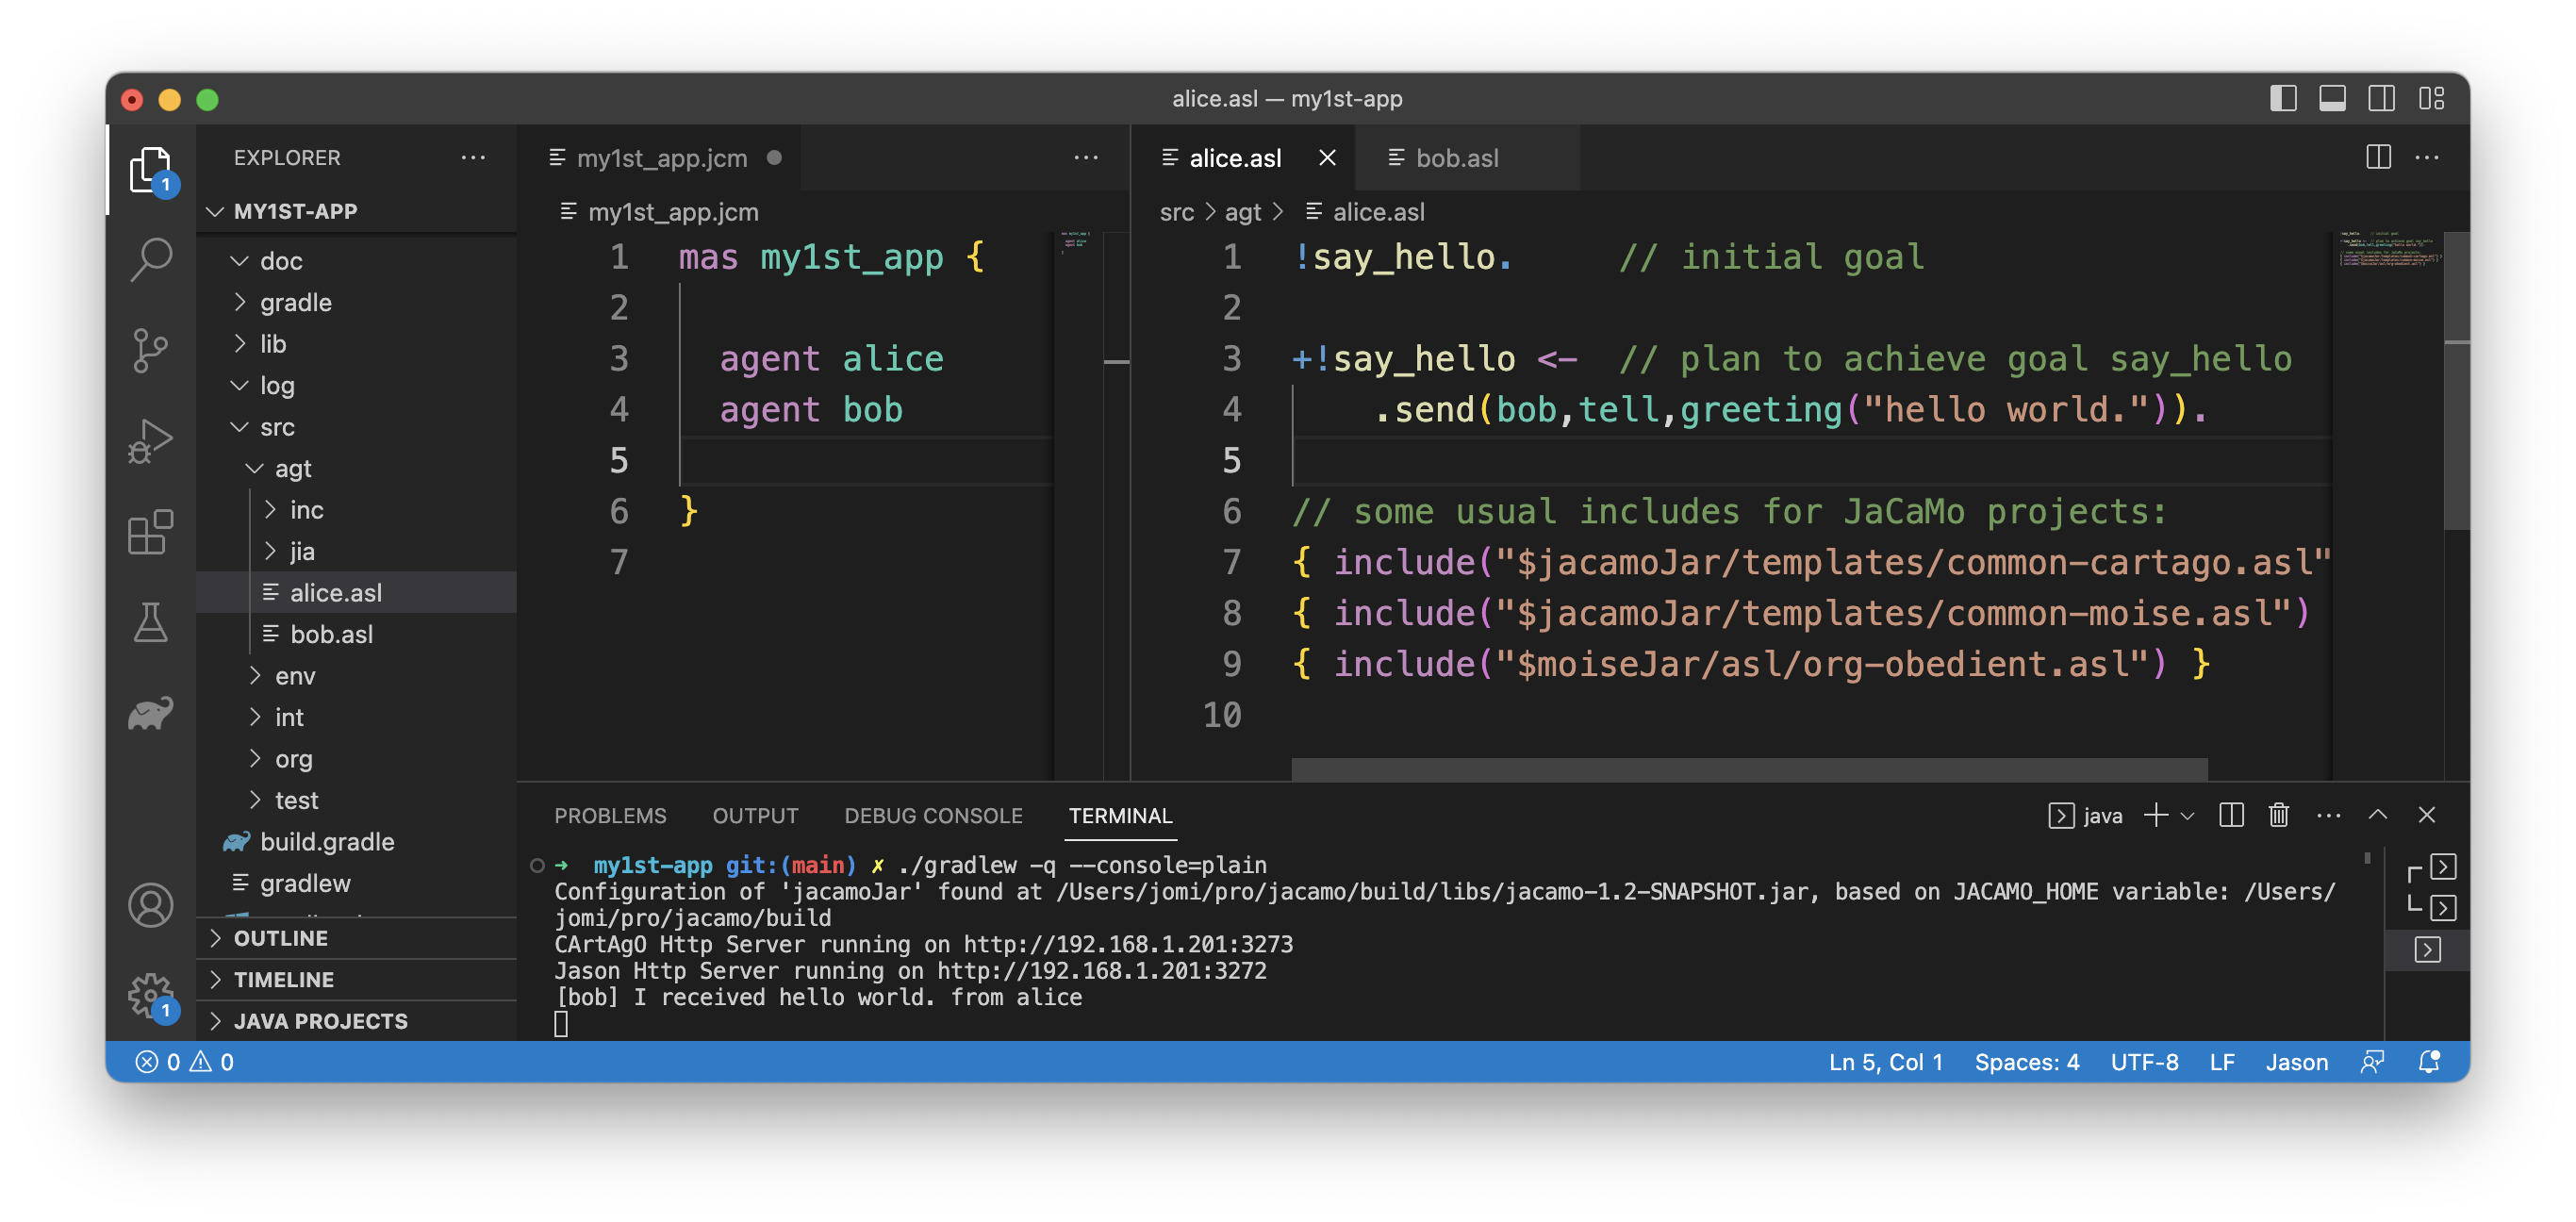
It follows also a screenshot of the application execution when using Visual Studio Code as the IDE.

Using a shared environment
The environment provides perception for the agents and it is where their
actions take place. In our application, agents will share an artifact of
the environment to get unique identifiers. This kind of artifact is
already included in the JaCaMo applications. It is in the file
src/env/example/Counter.java, so you do not need to implement it. We
will focus thus on how agents use it.
First, you need to set up our MAS environment with an instance of the Counter artifact. Second, our agents should focus on this artifact. These set up can be done changing the application file:
my1st_app.jcm
mas my1st_app {

  agent alice {
    focus: w.c1
  }
  agent bob {
    focus: w.c1
  }

  workspace w {
    // create a counter artifact named c1 with  initial value = 3
    artifact c1: example.Counter(3)
  }
}
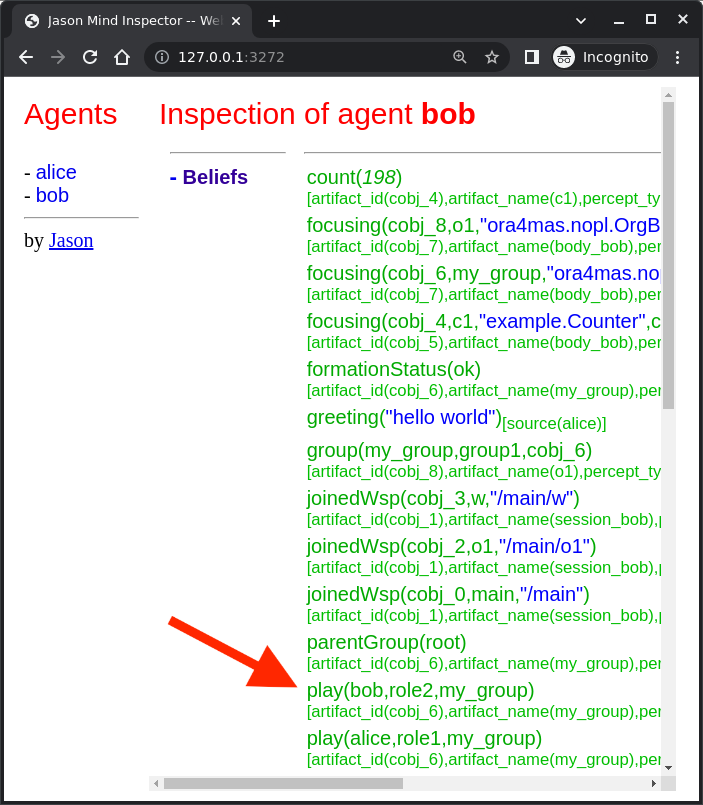
Note that both agents are focusing on the same artifact (identified by
c1 in workspace w). This artifact provides a count perception to
the agents, which is stored in their belief base. You can notice that by
running the application and taking a look at the mind inspector:

Now you can also inspect the environment state at http://127.0.0.1:3273:

The artifact also provides two actions: inc and inc_get. The latter
increments the counter and returns the new value. Let’s change Alice’s
source code to perform this action to continually increment the counter:
alice.asl
// initial goals
!say_hello.
!count.                              // *** new goal

// plan to achieve goal say_hello
+!say_hello
   <- .send(bob,tell,greeting("hello world")).

// plan to achieve goal count        // ** new plan
+!count
   <- inc_get(1,NewValue);           // ** acting on the environment
      .print("I've got the unique value of ",NewValue);
      .wait(1000);
      !count. // continue counting

// some usual includes for JaCaMo projects:
{ include("$jacamo/templates/common-cartago.asl") }
{ include("$jacamo/templates/common-moise.asl") }
{ include("$moise/asl/org-obedient.asl") }
Now, we will code Bob to also increment the counter continuously. Bob
uses the operation inc instead of inc_get, that has no parameter: it
increments the counter by 1. Since changes in the counter produces
changes in the belief count, Bob reacts to this changes printing the
new perceived value:
bob.asl
// *** initial goal
!count.

// plan to react to new beliefs
+greeting(M)[source(A)]
   <- .print("I received ",M," from ",A).

// *** plan to achieve goal count
+!count
   <- inc;          // act on the  environment
      .wait(2000);  // wait a bit and
      !count.       // keep counting

// *** plan to react to changes in belief count
+count(X)
   <- .print("counter = ",X).

// some usual includes for JaCaMo projects:
{ include("$jacamo/templates/common-cartago.asl") }
{ include("$jacamo/templates/common-moise.asl") }
{ include("$moise/asl/org-obedient.asl") }
So both agents are incrementing the value of a shared counter. Alice is getting unique values (for purposes not considered here) and Bob is just printing the values as soon as they are perceived:
[bob] counter = 3
[alice] I've got the unique value of 4
[bob] counter = 4
[bob] I received hello world from alice
[bob] counter = 5
[alice] I've got the unique value of 5
[bob] counter = 6
[alice] I've got the unique value of 6
[bob] counter = 7
[alice] I've got the unique value of 7
[bob] counter = 8
[alice] I've got the unique value of 8
[bob] counter = 9
[alice] I've got the unique value of 9
[alice] I've got the unique value of 10
[bob] counter = 10
[alice] I've got the unique value of 11
[bob] counter = 11
[alice] I've got the unique value of 12
[bob] counter = 12
[alice] I've got the unique value of 13
[bob] counter = 13
[bob] counter = 14
[alice] I've got the unique value of 14
[alice] I've got the unique value of 15
[bob] counter = 15
[bob] counter = 16
[alice] I've got the unique value of 16
Participating to an organisation
Let’s make the agents participate to an organisation. For that purpose, agents will play roles in groups of the organisation. We will create a group instance of group1 that Alice and Bob will join by adopting roles role1 and role2, respectively.
All possible groups and roles of an organisation should be specified in
an XML file. Here we will use the specification that is already included
in the application (file src/org/org.xml). This specification
defines a group type identified by group1 and the two mentioned roles
for this group. To create an instance of this group and assign its roles
to our agents, you can change the application configuration to:
my1st_app.jcm
mas my1st_app {

  agent alice {
    focus: w.c1
    roles: role1 in my_group
  }
  agent bob {
    focus: w.c1
    roles: role2 in my_group
  }

  workspace w {
    artifact c1: example.Counter(3)
  }

  organisation o1 : org.xml {
    // create a group instance identified by my_group
    group my_group: group1
  }
}
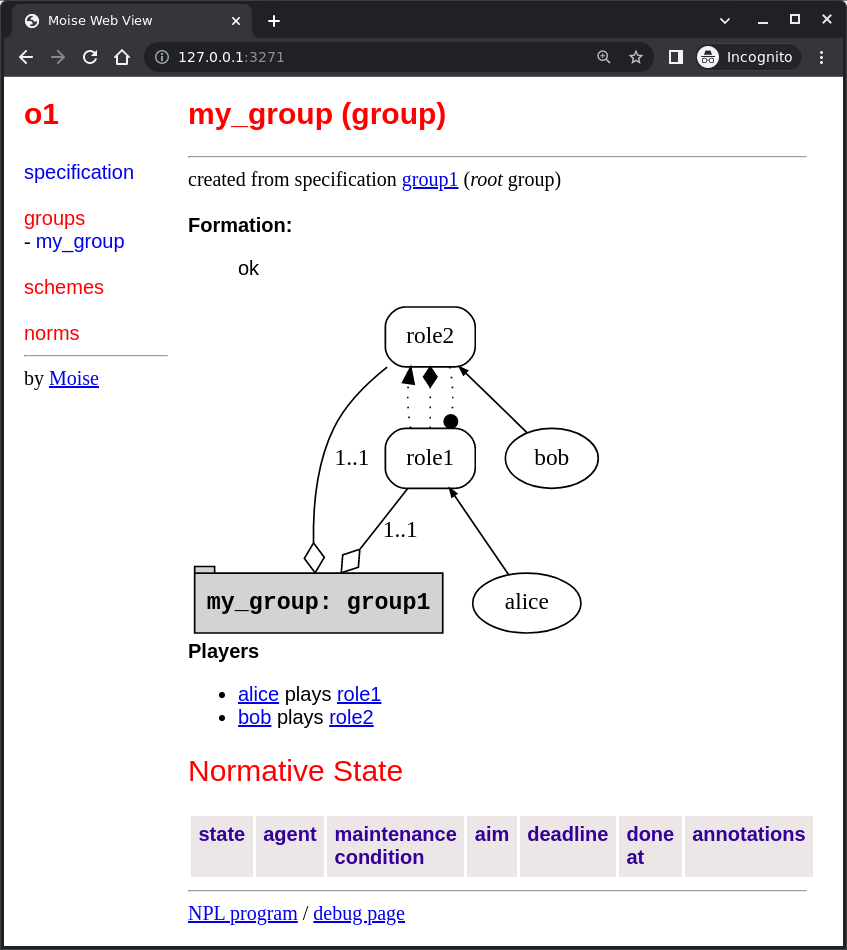
Now you can run the application and inspect the organisation state at http://127.0.0.1:3271:

The organisation provides several information for the agents to consider:

For the agent programming, we will change Alice’s source code so that
instead of sending a message to an agent named Bob, Alice sends a
message to an agent playing role2:
alice.asl
// new plan to achieve say_hello
+!say_hello
   <- .wait(play(Ag,role2,_)); // waits for a belief play/3 with the second term equals role2.
                               // Ag is bound to the name of the agent playing role2
      .send(Ag,tell,greeting("hello world")).
Using this implementation, Alice’s code is not tightly coupled with Bob
anymore. Another agent can replace Bob as the player of role2 and
Alice keeps running correctly.
What you have learnt
In this brief tutorial, you have learnt:
-
how to create a JaCaMo Applications,
-
how the source code of the application is usually structured, and
-
how to execute and see the current state of a JaCaMo application.